Capping your FPS in CS2 helps your game run smoother, keeps your computer from getting too hot, and prevents screen tearing. While uncapped FPS can make controls feel super fast, keeping a steady frame rate makes aiming easier and gameplay more stable. The main way to do this is with the console command fps_max.
Capping Your FPS Limit In CS2
You can set your maximum frame rate instantly via the console, or make the cap permanent using your Steam launch options.
1. Cap FPS Instantly via Console
This method is best for temporary adjustments or testing performance during a match.
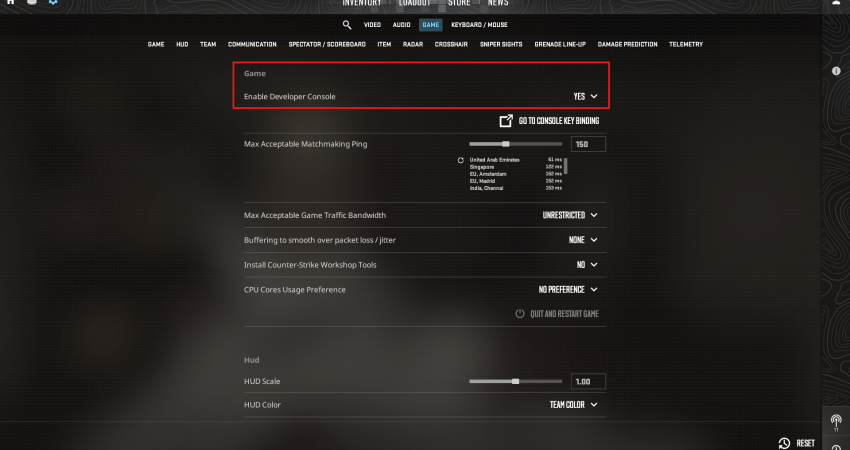
- Enable Console: Ensure the Developer Console (~) is enabled in your Game settings.
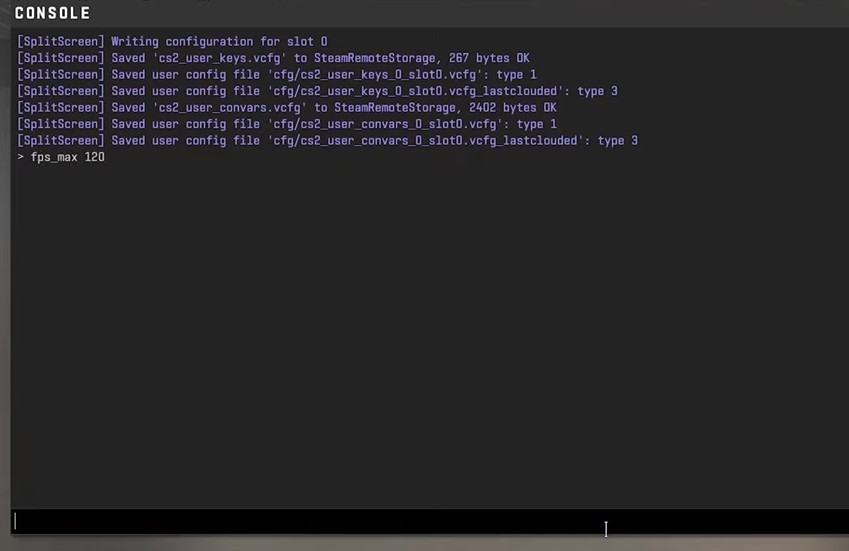
- Set Limit: Open the console and type fps_max 120 (replace 120 with your desired cap).
- Uncap: To remove the limit completely, use the command fps_max 0.
2. Cap FPS Permanently via Launch Options
This automatically applies your desired FPS limit every time you launch CS2.
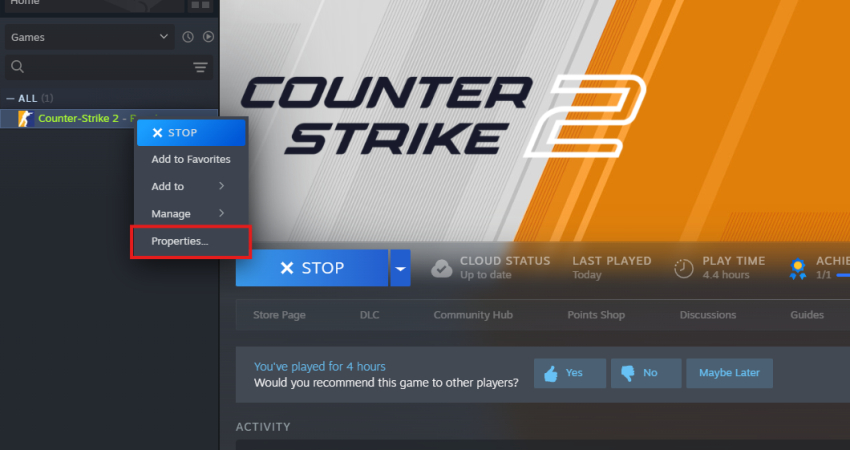
- Steam Library: Right-click CS2, select Properties, and stay on the General tab.
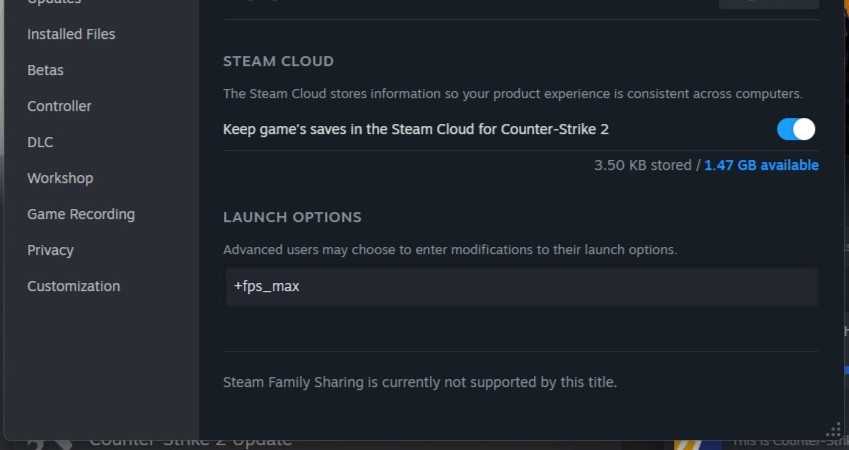
- Enter Command: In the Launch Options field, enter the command with a plus sign: +fps_max 120.
3. Limit Menu FPS
To prevent your GPU from generating excessive frames and heat while sitting idle in the main menu, use a separate command.
- Set Menu Limit: In the console, type fps_max_menu 60 or your desired low value. This command will cap your FPS only when you are not in a match.
4. Optimal Cap Value
For the best balance of smoothness and low input lag, you should cap your FPS slightly below your monitor’s refresh rate. If you have a 144Hz monitor, set your cap to 141 or 142 FPS. This prevents unnecessary rendering while maintaining stable frame times.
[RELEVANT: How To Get Better in CS2?]
Conclusion
Using fps_max to cap your FPS in CS2 is a simple way to make your game smoother and more consistent. A good rule is to set the cap slightly below your monitor’s refresh rate, like 141 FPS for a 144Hz screen. This keeps your gameplay steady, reduces screen tearing, and makes aiming feel easier.