Playing community-created Workshop maps is a great way to explore new challenges and practice in unique settings. If you’re curious about trying them out, here’s a quick guide on how to play Workshop maps in CS2.
Playing Workshop Maps In CS2
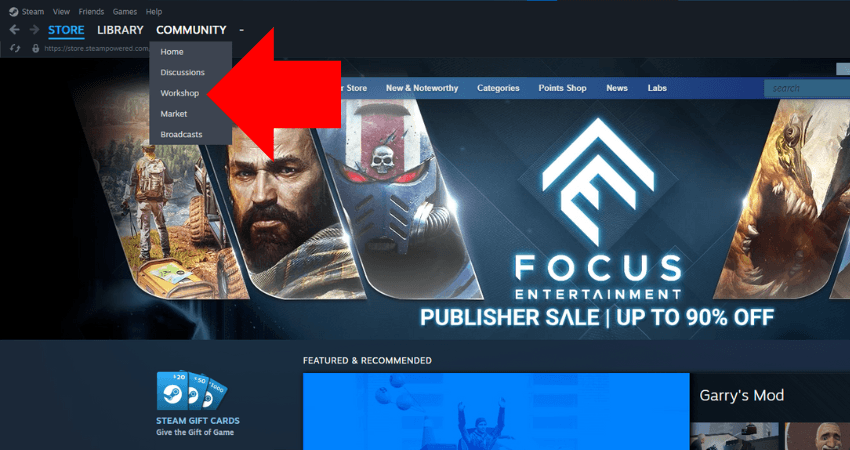
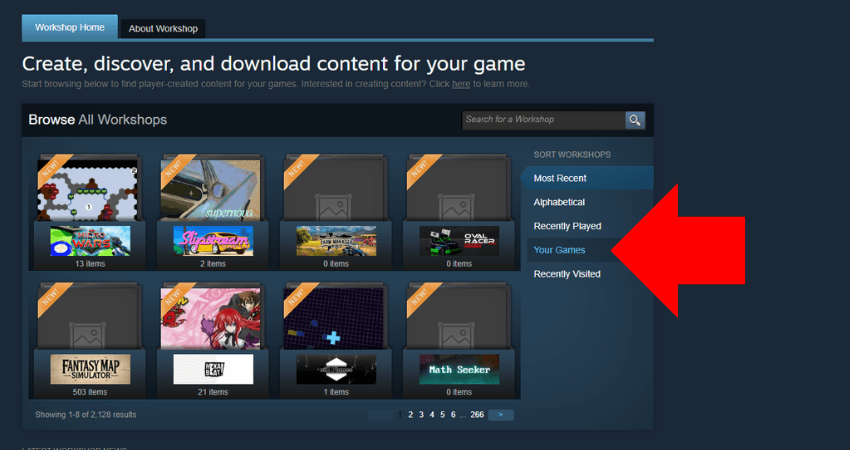
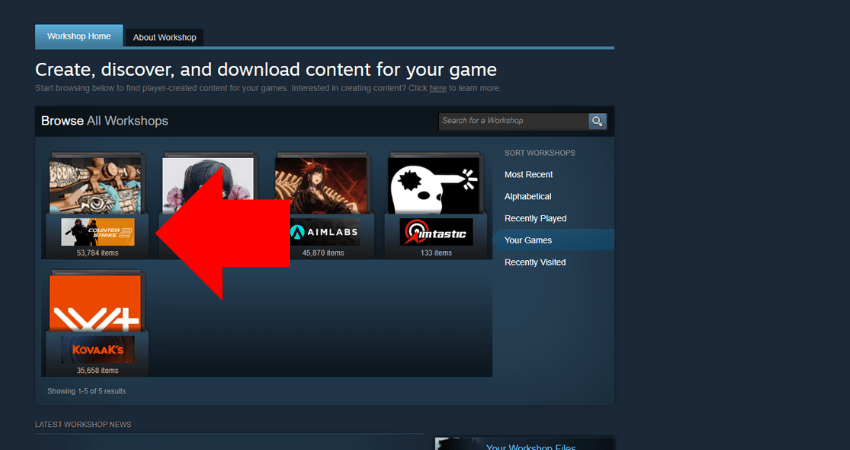
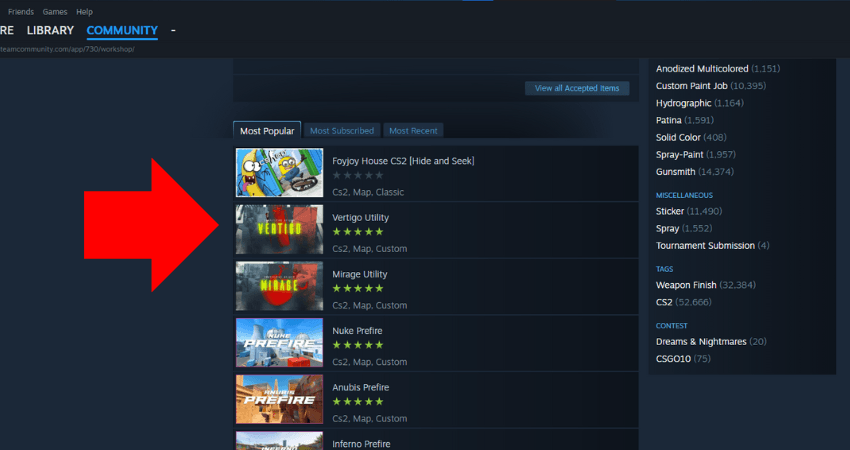
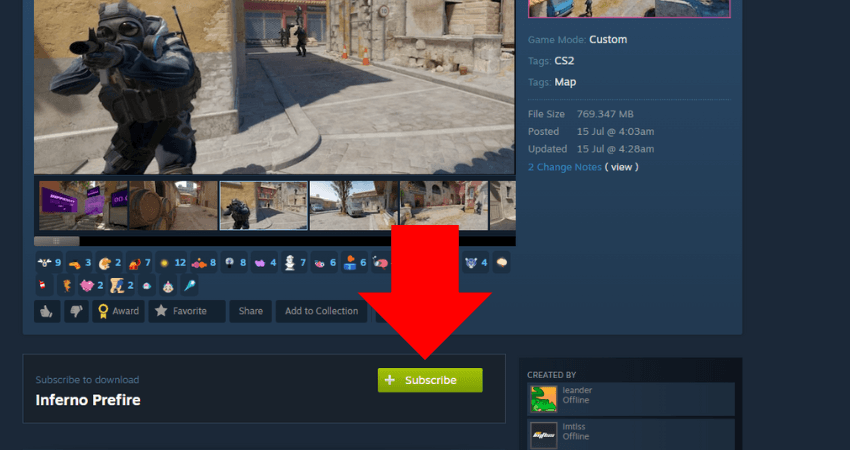
To start playing Workshop maps in CS2, you need to subscribe to them through Steam. Begin by launching Steam and navigating to the “COMMUNITY” section in the top left corner. Then click on the “Workshop” option, select “Your Games,” and choose CS2. From there, find the map you want to try, click on it, and hit the green “Subscribe” button.
Once subscribed, open CS2, click “PLAY,” and then select “WORKSHOP MAPS.” Choose the map from your list, hit “GO,” and you’re ready to dive into the action. If you want to follow each step in detail, check out the instructions below:
Step 1: Launch Steam.
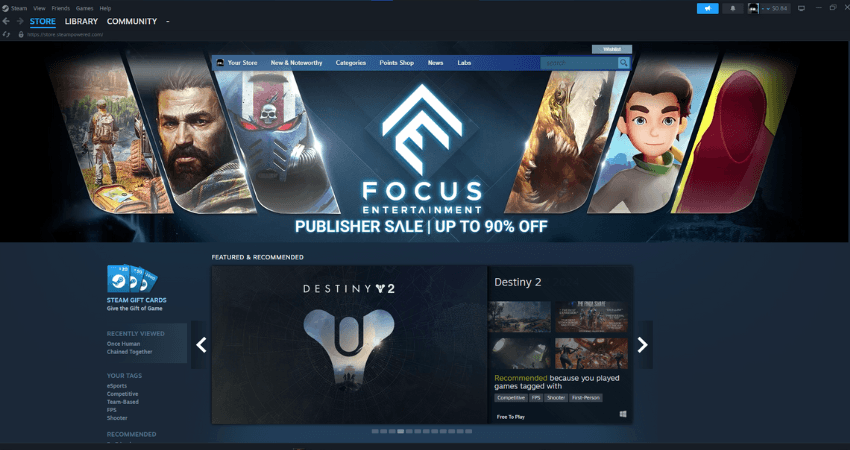
Step 2: Hover your cursor over the “COMMUNITY” tab.

Step 3: Click on the “Workshop” option.
Step 4: Click the “Your Games” option.
Step 5: Select CS2 from the list.
Step 6: Find the workshop map you want and click on it.
Step 7: Hit the green “Subscribe” button.
Step 8: Launch CS2.
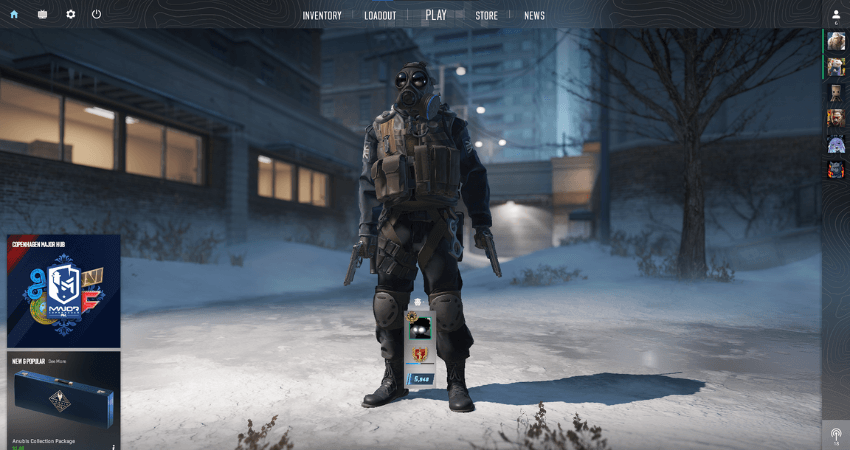
Step 9: Click the “PLAY” button on the home screen.
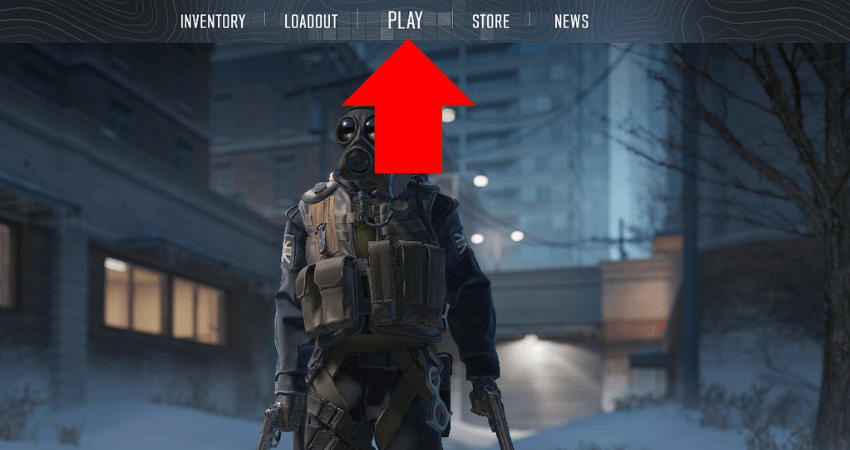
Step 10: Select the “WORKSHOP MAPS” option.
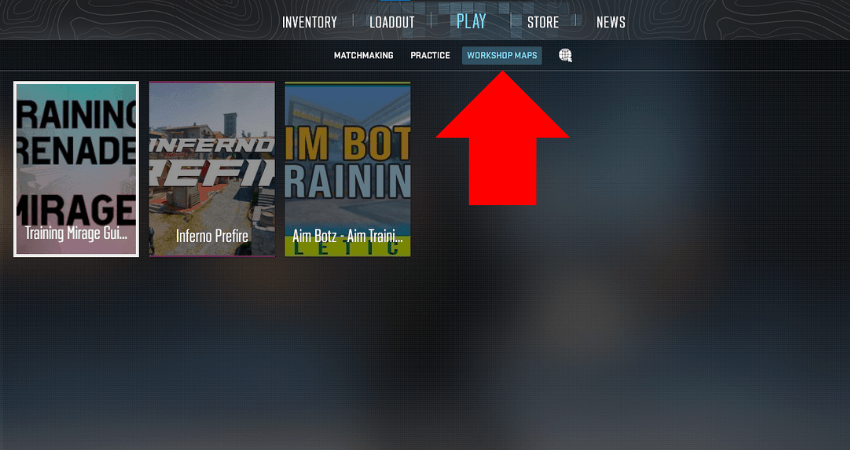
Step 11: Choose the map you just subscribed to.
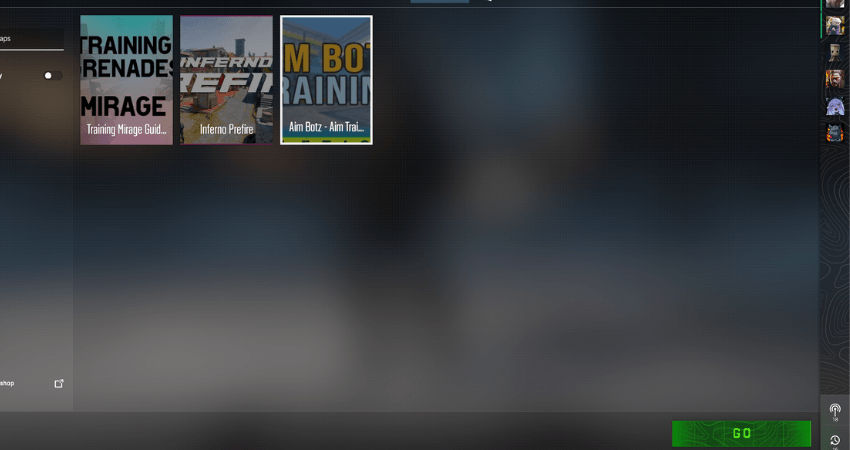
Step 12: Click the green “GO” button to start playing your selected Workshop map.

[RELEVANT: How to Delete CS2 Workshop Maps]
Conclusion
Now, you’re ready to jump into a brand-new map and explore unique custom game modes. To get the most out of your experience, consider inviting your friends to join the fun- these maps are always better with a full lobby! Enjoy experimenting and discovering everything the Workshop community has to offer.



Was clicking around for 10 minutes trying to launch a workshop map. This saved me from losing my mind.