
Creating an Autoexec file in CS2 is a smart way to keep your custom settings from resetting each time you launch the game. This file allows you to automatically load your preferred configurations without needing to redo them every time. If you’ve crafted an Autoexec file or downloaded one, here’s everything you need to know about where to place it in CS2.
Placing the CS2 Autoexec File in the Correct Folder
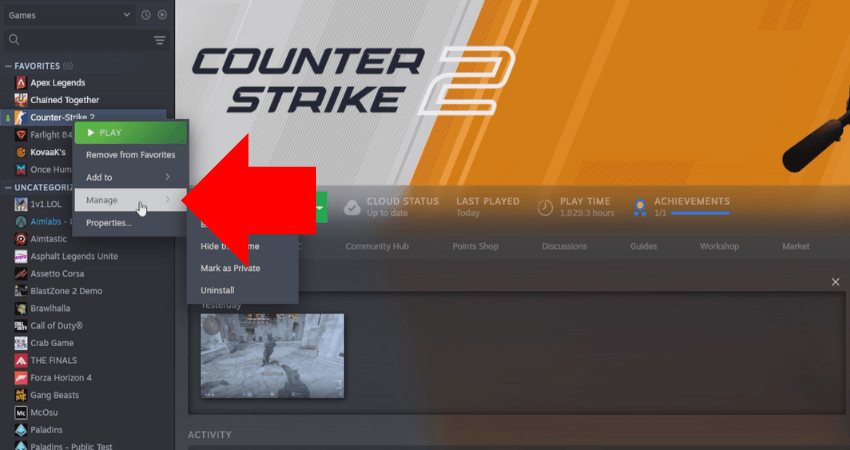
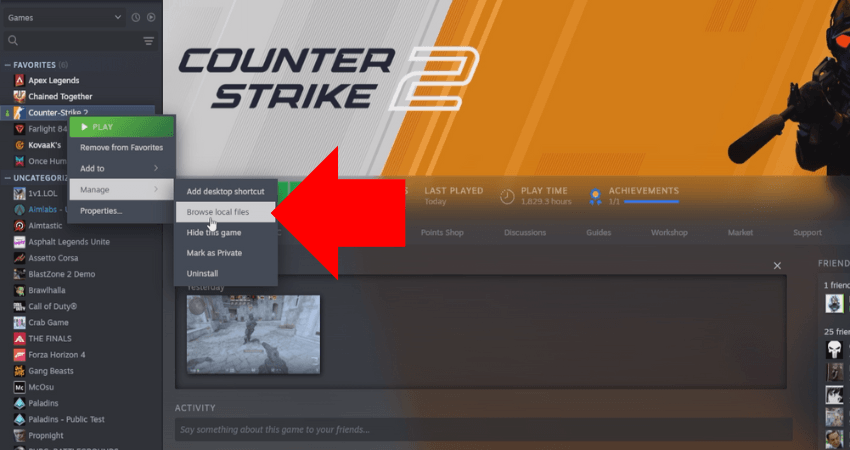
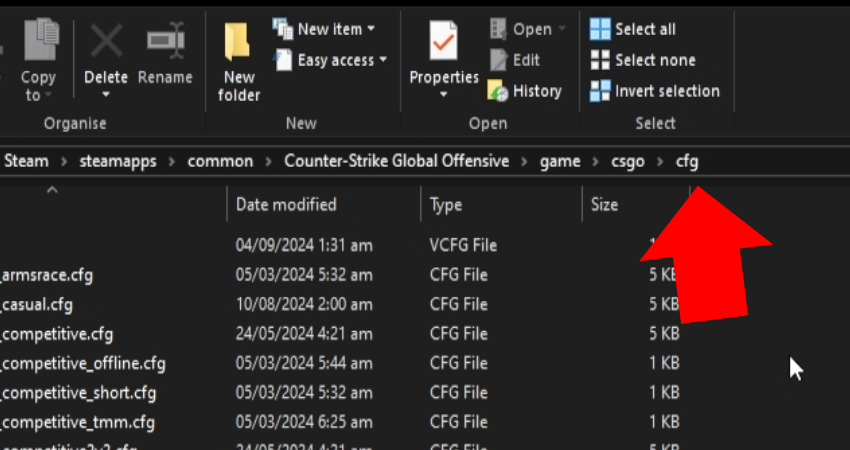
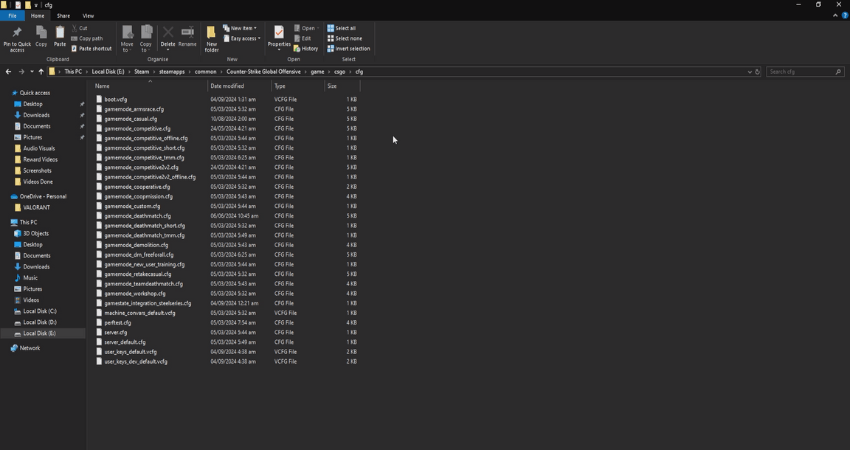
To make sure your CS2 Autoexec file works as expected, you’ll need to place it in the correct directory within your CS2 game files. To do this, go to your Steam library, right-click on CS2, and select Manage > Browse local files. Once the file explorer opens, follow the folder path game > csgo > cfg and drop the Autoexec file into the cfg folder. If any of this is unclear, follow the steps below to make sure your Autoexec file is set up correctly:
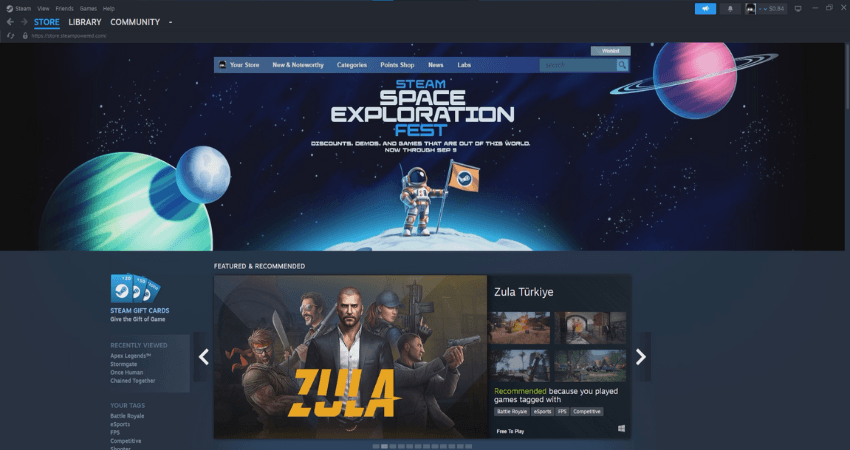
Step 1: Open the Steam client.
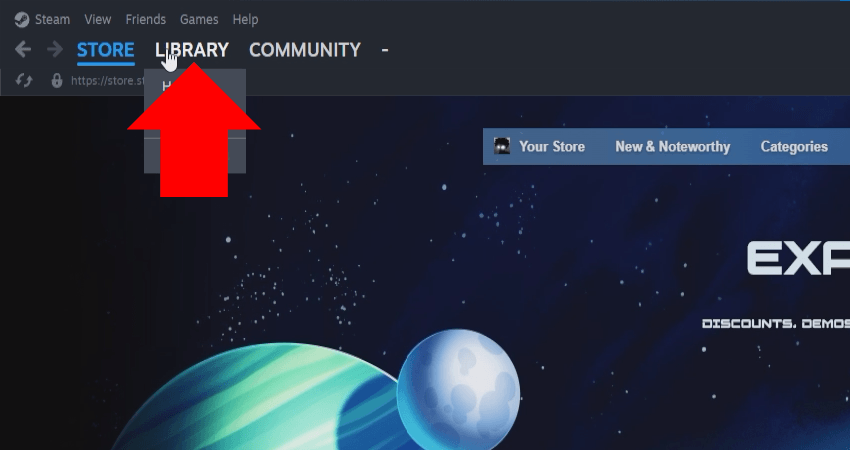
Step 2: Click on the “LIBRARY” tab at the top.
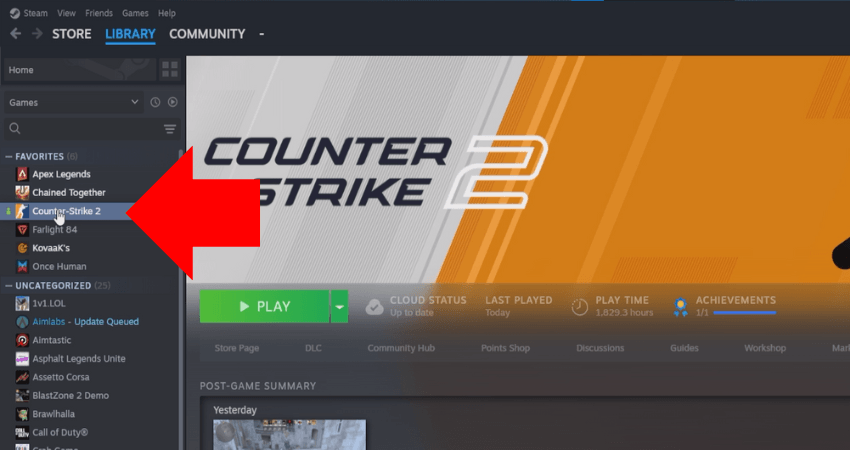
Step 3: Find Counter-Strike 2, then right-click on it.
Step 4: In the menu that appears, select the “Manage” option.
Step 5: From the second pop-up menu, click the “Browse local files” option.
Step 6: Go to the path: game > csgo > cfg.
Step 7: Place your Autoexec file in the “cfg” folder.
[RELEVANT: CS2 Autoexec Guide]
Step-by-Step Video Tutorial
Conclusion
To make sure your CS2 Autoexec file works without issues, follow each step carefully, paying close attention to step six for correct placement. Once it’s in the right folder, avoid deleting it. Instead, keep a backup copy, so you always have it on hand if needed


